Treasured by Holly

Valentine Heart Garland

Holly PitcherComment

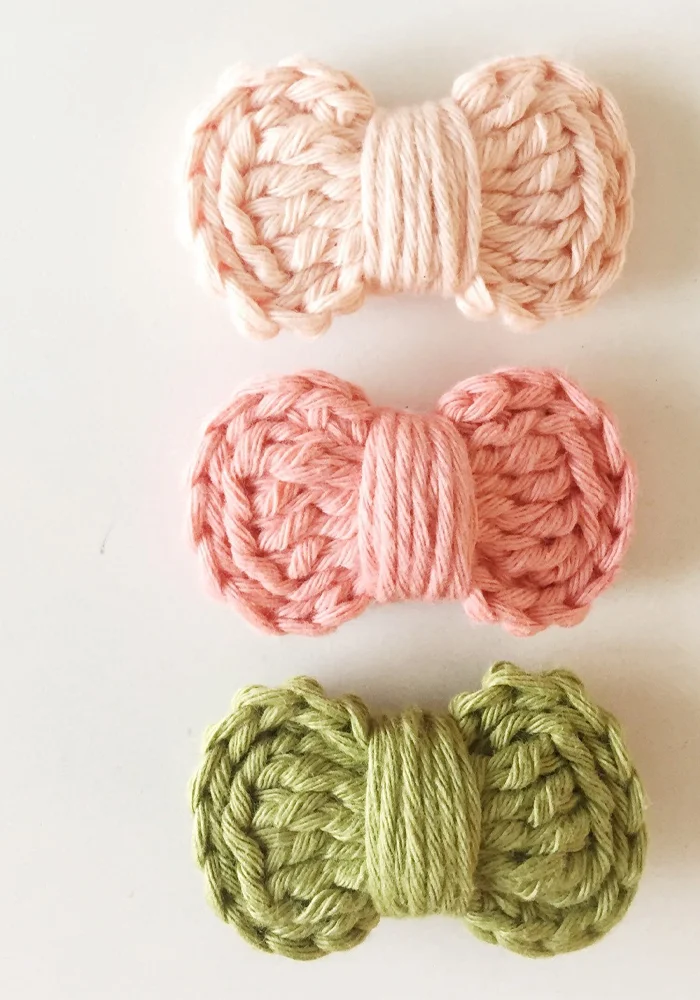
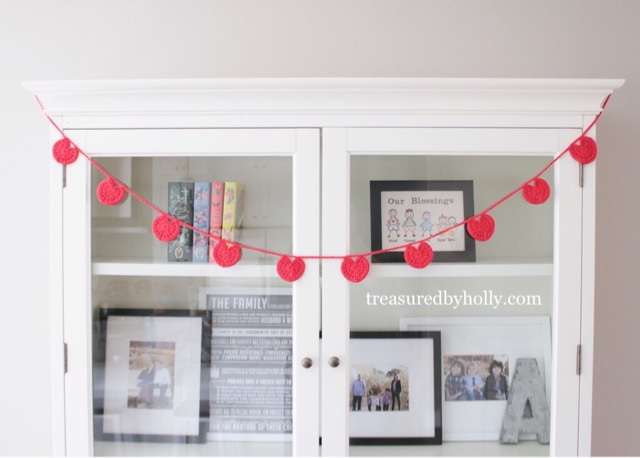
Are you needing a fun and unique addition to your Valentines décor. Give your home a little love with this super cute and easy to make Crocheted Heart Garland.


Materials needed:
G Hook
Worsted Weight Yarn (I prefer Drops Paris in Red #12)

Abbreviation list:
CH - Chain
SC - Single Crochet
TR - Treble Crochet
Sl st - Slip Stitch

Round 1: Create a Magic Ring (video tutorial here) and CH 3, 7 TR, CH 1, 7 TR, CH 3 and then Sl st inside the Magic Ring.

Round 2: CH 4, 2 SC in the next 7 TR, CH 2, 2 SC in the next 7 TR, CH 4 and Sl st inside the Magic Ring. Close ring, fasten off and tie in ends.

Repeat 9 more times for a total of 10 hearts.

Garland:
Chain 50
Attach hearts by SC into top of CH 4 on one side of the heart, CH 5, SC to top of CH 4 on other side, CH 15. Repeat for each heart until you reach final heart. After last SC, CH 50 and fasten off.


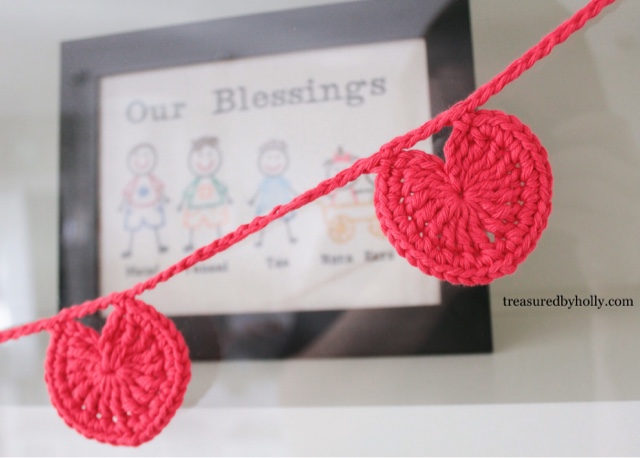
Hope you enjoy making this cute little garland!! Happy Crocheting!


Mini Crochet Bow Pattern - Free

Holly PitcherComment

One of my most favorite patterns that I have created to date are these fun Crochet Bows. They are my go to for Baby shower gifts as they are quick and easy to make. Perfect on a headband or hair clip these little bows are sure to delight!

Mini Puff Bow or Single Bow

SKILL LEVEL: 

Beginner/Intermediate

CROCHET HOOK:

Size F

YARN SIZE:

3 or 4 (DK-Worsted weight)

SIZE:

One Size fits all

FINISHED SIZE:

2 1/2 in.

First Bow –

Rnd 1:

Ch 5. Tr into 1st Ch 4 times , Ch 4, slip stitch into 1st ch.

Rnd 2:

Ch 4. Tr into 1st Ch 4 timess , Ch 4, slip stitch into 1st ch.

Tie off weave in ends. (If making single bow leave one tail and skip to Finishing)

Second Bow –

Rnd 1:

Ch 5. Tr into 1st Ch 4 times , Ch 4, slip stitch into 1st ch.

Rnd 2:

Ch 4. Tr into 1st Ch 4 times , Ch 4, slip stitch into 1st ch.

Rnd 3:

Without tying off, weave in beginning tail and place hook back into last slip stitch made. Ch 1. Place bows back to back and Sc through the two top loops that are touching (back loop of front bow and front loop of back bow) all the way around, stitching the two bows together (24 total Sc around bow).

Rnd 4:

Slip stich into first Sc. Measure out an 18” tail and cut yarn.

FINISHING

Take tail and wrap around center of bow. Weave in ends. Now you can hot glue an alligator clip (single or double prong whichever you prefer), elastic or metal headband to the back of the bow. Allow to dry and it’s ready to use.

crochet mini bows

Have fun crocheting!!!

Breathe and have Courage to Simplify

Holly PitcherComment
Going into my third year of choosing my One Little Word with Ali Edwards it always amazes me how my word always finds me. This year it wasn't any different. Though I did fight this word at first, I knew in the end it was meant to be. My word for 2015 is:


As I've taken my previous words into my life I have learned to Breathe and just slow down and enjoy each moment, to have the Courage that its okay to say no and to be myself and now with Simplify I want to work smarter not harder. By definition, to make things less complex. I love how each of these words are building on each other to help me become a better mother, wife and friend.


My goal in 2015 is to bring my life down to its simplest level of wife, mother, friend and business owner. I'm not going to compare what I'm doing wrong, or even right, to those that surround me. It is to easy to get caught up in the politics of life. "She" has what I want or why can't I be more like "her". The best is what is "she" doing right that I'm doing wrong. Who is this "she" that makes me feel so inadequate? It could be business's that I follow, people that I admire or friends that surround me. I don't want that to be my driving force. This year I want to let that go (feel free to break out in song now, lol) and focus on simplifying my life and how I can make it better for me and my family.

Here in this first week of January I don't know what this means for me, but I am so excited for this journey. 2015 lets do this!!!

Hand Exercises for Crochet and Knitting

Holly Pitcher1 Comment

Crocheting, or Knitting for that matter, can wreak havoc on your fingers and wrists especially if you’re doing it for long hours at a time. On average  I usually spend about 4-5 hours a day crocheting. Though, during the fall/winter months that will double. Before I begin I exercise my fingers and wrists to help with pain and stiffness that can occur. I also take a break about every 45 minutes to perform these exercises again. It totally helps me and I hope it will help you as well!


Exercises for the Fingers

  • Place your Left pinkie finger in your right palm and press pinkie back repeat for all fingers then switch to your Right pinkie and repeat for each finger. Next take your thumb and press fingers into your palm and repeat for each hand.
  • Hold your hands in front of you and curl your fingers so they touch the bottom of your palm. Slowly uncurl them until they are once again straight. Repeat at least 5 times.
  • Spread your fingers as far apart as you can. Next bring them together forming a fist and squeeze. Repeat at least 5 times.
  • Use the thumb and forefinger of one hand to massage the web of the thumb on the other.
  • Twirl your thumbs in a circular motion.

Exercises for the Wrists

  • Hold your hands arms out to sides of your body and make a fist. Draw circles with your wrists while pressing your arms backwards.
  • Place your palms together (think yoga-prayer position) and push. Angle your wrists downwards with your elbows slightly up. Hold for a minute or so.
  • Lay the back of your hand on a flat surface, and press down lightly with your arm. Hold for a minute or so and repeat for other hand.
  • Bring your right hand up palm forward and place your left thumb on your wrist with your fingers placed on the back of your wrist. Using your thumb and fingers massage the bones and tendons that are in your wrist. Repeat for other wrist.

*Don’t forget to stretch your neck and your back as well. Every little bit helps!

ABOUT ME

Holly PitcherComment


When my grandmother taught me to crochet it was something that she and I could do together. I could never really master much, but I would sit and watch her while she worked.

Fast forward 30 years and it has pretty much become a part of me. My grandmother is gone, but her lessons are not. From creating a pattern to crocheting it into something amazing, this journey has been inspiring. I infuse my heart and soul into each piece I create and send it along to you hoping you will love it as much as I loved making it.

BUBBLEFRAME APP

Holly PitcherComment
Archived Patterns -
 
Did you know BubbleFrame has over 200+ background patterns. To access them all, simply tap on the little box found on the bottom right side of the pattern box. Each month we try to update with 12 new patterns and rotate older ones into this storage section. This helps us to conserve app size while still bringing you new material ;)


Layering Tab -

This one focuses on the layering tab. The layers tab works a lot like photoshop/photoshop elements. You can tap on a specific bubble to edit or hold your finger down to drag that layer up or down which brings the bubble to the front or to the back of all the bubbles. This really helps when your working with transparency, using the edit tabs or using a lot of layered bubble frames. If you don't need to rearrange the frame layers a shortcut you can use is to just tap on the bubble layer you are wanting to edit.


Edit Bar -

 
The edit modes are probably the functions I use the very most. It's almost essential to have a feel for these little functions. 

1. Adjust picture - this option only shows up if your frame is filled with a picture. It allows you to resize your image inside the bubble. I use this function when I create my edits using multiple bubble frames with only one picture (I will have a video tutorial up soon on how I do it step by step).

2. Adjust position - this lets you move your selected bubble to different position on your canvas. If you swipe with one finger it will move the bubble. Once you have it in place you can pinch to change the size if you need to.

3. Adjust size - this lets you change the size of your selected bubble by swiping one finger up and down on the screen.

4. Snap to grid - my ultimate favorite tool!!! Turn this on to find center or if using multiple bubbles for even spacing. You can change the grid rows if needed (I'll show you how to do that in another tutorial) which when using multiple bubbles is almost a must.


Options Menu -

The options menu...

1. Show Help - With any function highlighted you can hit this button and a tutorial will pop up

2. Set Grid Rows - This lets you change your grid rows from 3 up to 12 rows. The perfect tool for spacing your bubbles evenly whether it's to find center or having multiple bubbles evenly grouped together. When I'm using this tool I always adjust between 9 and 12, but that's just me, lol.

3. Raise Bubble - This function will bring your bubble up one level each time you press it. I prefer to use the layers function to do this because you can't move it back once you raised it and in the layers section you can move it wherever you need.

4. Clone Bubble - Love this tool! If you're going to be using a lot of bubbles on your canvas this can make your life so much easier! It helps if you want your border, shadow, even your pattern or picture to remain exactly the same. I usually create one bubble and then clone it however many times I need and then fill my bubbles with pics, patterns etc. as I go.

5. Pop Bubble - Pretty self explanatory, lol. You can also pop or delete a bubble from the main canvas just by holding your finger on the bubble you want to delete and it will "pop". And if you didn't mean to pop it you can hit undo. If you ever notice a bubble start to shake as your working on it that means its about to pop. Stop what you're doing and once it settles you can begin


Circle Text -

Ever wonder how the circle text in BubbleFrame works??? Well here's a little tutorial for you...

1. Clockwise button - text is written clockwise around your bubble (perfect for text placed at the top of your bubble)

2. Counter button - text is written counter clockwise around your bubble (perfect for text placed at the bottom of your bubble)

3. Rotation button - lets you rotate your text around your bubble

4. Offset button - moves your text inside the bubble or farther outside the bubble

5. Kerning button - squeezes your letters closer together or moves them farther apart

I hope this helps all you BubbleFrame users master the art of circle text. Can't wait to see what you come up with!! And don't forget to tag your photos with #bubbleframe or #fab4fridays for a chance to have your work featured every Friday!!


Installing your own fonts -

Installing your own fonts seems daunting but is oh so fun! You can't download fonts directly from within BubbleFrame. The button "Install Fonts" is an information button only. The easiest most simplest way to download fonts into BubbleFrame is using your iphone/itouch/ipad to do so. 

1. Go into safari (Internet) and search for "free fonts" or here are some sites that I use a lot: Dafont.com Urbanfonts.com 1001freefonts.com There are millions of sites that offer free fonts so play around to find what you like best. Most of the sites you go to will either list by popularity or you can search for a specific type. Once you find one you like there should be a little download button next to it. Simply tap on download and a screen will pop up asking where you want to download to.

2. Tap on BubbleFrame and it will automatically add it to your "My Fonts" section. These will not cross devices so if you're wanting a specific font on each of your devices you will need to add it to each one. Sometimes more than one type of font for the one you selected will also download i.e. italics, bold, etc. you can swipe to delete any that you don't want.

3. Once you download you will need to refresh the screen simply by going out of the text option and back in for your new fonts to appear.


Video Tutorial -
I've also created a video tutorial if you're needing a walk-through. It is a bit long at 15 minutes, but it takes you through beginning to end when using BubbleFrame. It explains everything about the app as I go through the process. Enjoy!