Treasured by Holly

ABOUT ME

Holly PitcherComment


When my grandmother taught me to crochet it was something that she and I could do together. I could never really master much, but I would sit and watch her while she worked.

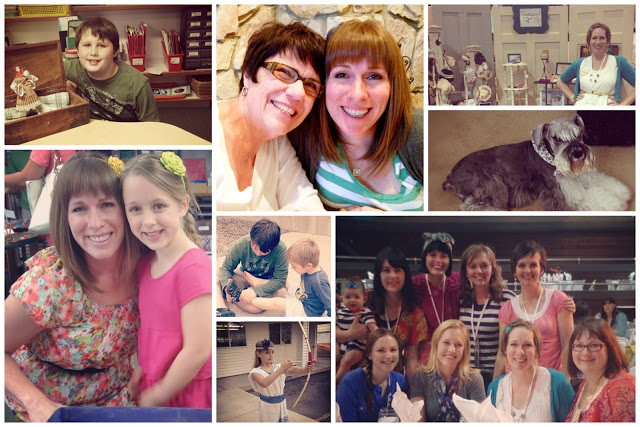
Fast forward 30 years and it has pretty much become a part of me. My grandmother is gone, but her lessons are not. From creating a pattern to crocheting it into something amazing, this journey has been inspiring. I infuse my heart and soul into each piece I create and send it along to you hoping you will love it as much as I loved making it.

BUBBLEFRAME APP

Holly PitcherComment
Archived Patterns -
 
Did you know BubbleFrame has over 200+ background patterns. To access them all, simply tap on the little box found on the bottom right side of the pattern box. Each month we try to update with 12 new patterns and rotate older ones into this storage section. This helps us to conserve app size while still bringing you new material ;)


Layering Tab -

This one focuses on the layering tab. The layers tab works a lot like photoshop/photoshop elements. You can tap on a specific bubble to edit or hold your finger down to drag that layer up or down which brings the bubble to the front or to the back of all the bubbles. This really helps when your working with transparency, using the edit tabs or using a lot of layered bubble frames. If you don't need to rearrange the frame layers a shortcut you can use is to just tap on the bubble layer you are wanting to edit.


Edit Bar -

 
The edit modes are probably the functions I use the very most. It's almost essential to have a feel for these little functions. 

1. Adjust picture - this option only shows up if your frame is filled with a picture. It allows you to resize your image inside the bubble. I use this function when I create my edits using multiple bubble frames with only one picture (I will have a video tutorial up soon on how I do it step by step).

2. Adjust position - this lets you move your selected bubble to different position on your canvas. If you swipe with one finger it will move the bubble. Once you have it in place you can pinch to change the size if you need to.

3. Adjust size - this lets you change the size of your selected bubble by swiping one finger up and down on the screen.

4. Snap to grid - my ultimate favorite tool!!! Turn this on to find center or if using multiple bubbles for even spacing. You can change the grid rows if needed (I'll show you how to do that in another tutorial) which when using multiple bubbles is almost a must.


Options Menu -

The options menu...

1. Show Help - With any function highlighted you can hit this button and a tutorial will pop up

2. Set Grid Rows - This lets you change your grid rows from 3 up to 12 rows. The perfect tool for spacing your bubbles evenly whether it's to find center or having multiple bubbles evenly grouped together. When I'm using this tool I always adjust between 9 and 12, but that's just me, lol.

3. Raise Bubble - This function will bring your bubble up one level each time you press it. I prefer to use the layers function to do this because you can't move it back once you raised it and in the layers section you can move it wherever you need.

4. Clone Bubble - Love this tool! If you're going to be using a lot of bubbles on your canvas this can make your life so much easier! It helps if you want your border, shadow, even your pattern or picture to remain exactly the same. I usually create one bubble and then clone it however many times I need and then fill my bubbles with pics, patterns etc. as I go.

5. Pop Bubble - Pretty self explanatory, lol. You can also pop or delete a bubble from the main canvas just by holding your finger on the bubble you want to delete and it will "pop". And if you didn't mean to pop it you can hit undo. If you ever notice a bubble start to shake as your working on it that means its about to pop. Stop what you're doing and once it settles you can begin


Circle Text -

Ever wonder how the circle text in BubbleFrame works??? Well here's a little tutorial for you...

1. Clockwise button - text is written clockwise around your bubble (perfect for text placed at the top of your bubble)

2. Counter button - text is written counter clockwise around your bubble (perfect for text placed at the bottom of your bubble)

3. Rotation button - lets you rotate your text around your bubble

4. Offset button - moves your text inside the bubble or farther outside the bubble

5. Kerning button - squeezes your letters closer together or moves them farther apart

I hope this helps all you BubbleFrame users master the art of circle text. Can't wait to see what you come up with!! And don't forget to tag your photos with #bubbleframe or #fab4fridays for a chance to have your work featured every Friday!!


Installing your own fonts -

Installing your own fonts seems daunting but is oh so fun! You can't download fonts directly from within BubbleFrame. The button "Install Fonts" is an information button only. The easiest most simplest way to download fonts into BubbleFrame is using your iphone/itouch/ipad to do so. 

1. Go into safari (Internet) and search for "free fonts" or here are some sites that I use a lot: Dafont.com Urbanfonts.com 1001freefonts.com There are millions of sites that offer free fonts so play around to find what you like best. Most of the sites you go to will either list by popularity or you can search for a specific type. Once you find one you like there should be a little download button next to it. Simply tap on download and a screen will pop up asking where you want to download to.

2. Tap on BubbleFrame and it will automatically add it to your "My Fonts" section. These will not cross devices so if you're wanting a specific font on each of your devices you will need to add it to each one. Sometimes more than one type of font for the one you selected will also download i.e. italics, bold, etc. you can swipe to delete any that you don't want.

3. Once you download you will need to refresh the screen simply by going out of the text option and back in for your new fonts to appear.


Video Tutorial -
I've also created a video tutorial if you're needing a walk-through. It is a bit long at 15 minutes, but it takes you through beginning to end when using BubbleFrame. It explains everything about the app as I go through the process. Enjoy!


Snickerdoodle Bars

Holly Pitcher1 Comment

Lately I have become a little bit lazy when it comes to cookie making. I love the dough, but not the time it takes to sit and wait for batches of cookies to bake. Especially when it comes to cookies like peanut butter, sugar cookies and snickerdoodles because of all the extra work it takes to prep the cookie dough before baking. I realize by lumping peanut butter cookies in there it tells you exactly how lazy I am, lol.


With that being said I've been creating a lot of bar cookies. Make the dough, press it all into a pan, bake and bam...done! I would like to say they all turn out fantastic, but that is so not the case. Lots of trial and error people!! Well, finally, one paid off. I have fallen in love with this Snickerdoodle Bar recipe and after making it 3 weeks in a row can now say its not a dud, lol. The best part is my family completely agrees, yay!!! I hope you like them as much as we all do.

Snickerdoodle Bars

2 2/3 cups all-purpose flour
2 teaspoons baking powder
1 teaspoon salt
2 cups packed brown sugar
1 cup butter, at room temperature
2 eggs, at room temperature
1 Tablespoon vanilla
2 Tablespoons white sugar
2 teaspoons ground cinnamon

1. Preheat oven to 350 degrees. Lightly grease a 9 x 13 inch baking pan.
2. In a medium bowl, whisk together the flour, baking powder and salt. Set aside.
3. In a large mixing bowl, beat together the butter, brown sugar, eggs and vanilla until smooth. Add the flour mixture to the egg mixture and beat until well blended.
4. Spread the batter evenly in the prepared pan.
5. In a small bowl, combine the white sugar and cinnamon.
6. Sprinkle the mixture evenly over the batter in the baking pan.
7. Bake for 30 minutes.
8. Let cool slightly then cut into squares.

Long time no write :(

Holly Pitcher1 Comment

I can't believe how long it's been since I've taken the time to write a post. I'm laying here on the couch and thought what the heck...

I have been busy trying to redo the upstairs. We have lived here 3 1/2 years and I haven't touched it at all...crazy right!! Well I changed that in a hurry!! I started with the kitchen by removing the top chair rail and reprinting. Then removed some cabinets. We don't have the funds to purchase the cabinets I want right now, but I'm okay with that ;)

What's a few months...

Holly PitcherComment
In the grand scheme of things a few months is just a blink of an eye, but in the blogger world its years. I can't believe how long it's been since I have blogged, but I kinda got took over by life and a little social thing called Instagram. Don't shoot me, but I'm loving it more than Pinterest. I know, crazy right??

Well how do I sum up a bit of whats been going on...pictures. Enjoy!!!


A must visit and a little treasure

Holly Pitcher1 Comment
Last week when I was on my way home from SNAP I couldn't help but make a side trip. Heber City is one of my most favorite cities in the world. Just south of Park City Utah it is a second home to me. My parents are both from there so I spent the majority of my youth there vacationing. Now that all of my grandparents are deceased I don't make it up there as much as I would like. So as I was headed down I-15 looking east to Timpanogos I naturally took the exit. I called my Aunt and cousins and was all smiles as I entered the valley.

It was amazing to be able to spend a couple of hours feeling like I'd come home. It was a great re-charge of my system. Especially when I was able to spend a little time here:


They were a very important in my life and miss them daily!!


On a much happier note my cuz gave me the most fabulous little treasure...a recipe. Any of you who are lucky enough to visit Heber they have a most amazing burger joint called Dairy Keen. They posted a few of their recipes in the local newspaper and the name alone had me excited...Waffle French Toast!!


 Waffle French Toast
Makes 5 Slices

2 Eggs
1/4 cup Milk
1 tsp Sugar
1 tsp Cinnamon
5 slices of Bread

Preheat your waffle iron. Spray with cooking spray. Mix the egg, milk, sugar, cinnamon together in a bowl that will fit the bread. Dip the bread into the egg mixture, turn the bread over to cover all the bread. Place the soaked bread into a pre-heated waffle iron. Close the lid and press down slightly. Cook for 1 to 1 1/2 minutes. Open the lid and remove. Enjoy with maple syrup or powdered sugar.

They are amazing!! My kids couldn't get enough and neither could I :)